Thursday, February 27, 2014

Stop IDM (Internet Download Manager) Automatically Download Videos Or Media Files For All Browser

Friends, you are finding the solution for stop automatically video download in IDM (Internet Download Manager) from browser in Google chrome, Mozilla Firefox. For that IDM giving option to stop this types of download from web browsing using inbuilt features. For that you have to set it manually in two steps easily.

Why we have to stop auto download Option in IDM?

Without stopping this option in IDM you can’t enjoy or watching live or online video from the web browser. To see video from these sites you must download to see video.

Useful:

Auto Download video start by IDM is useful

Some of the time auto download option is useful for US. Because YouTube video can’t download directly from YouTube URL pasting in IDM add URL button from the top IDM ribbon.

If you have facing problem of auto download video at that time you can set it stop manually through the below steps.

Step to stop automatically download audio or video (Media file) in IDM

Step 1:
Open IDM (Internet download manager) in your Laptop or PC.

Step 2:
Open Option under Download > Option from top menu. For more see in below picture
Stop automatically download video or media file in IDM S1

Step 3:
Then uncheck “Automatically start download of URL placed clipboard” and “Use advance browser integration” options display in below screen.
Stop automatically download video or media file in IDM S2

Step 4: (Optional)
Then select “Yes” from “user account control” for change in current system.

Note : Now you can enjoy any video from auto download on any site without restarting web browser(Chrome, Firefox and others)

Other searches:
Disable auto download video in IDM, useful tricks in IDM, stop download video from opened site, how to play video without download in IDM, why video auto download in IDM.

This trick works for all IDM versions. If you having problem in this trick kindly place your speech in below comment box. We will resolve in working 24hours. Don’t miss to share this tricks with your friend using below sharing button.

How to enable Gmail tab in MAC Menu bar: Gmail Shortcut for MAC OS | Apple laptop or Desktop

Friends, if you are using MAC laptop or PC then Gmail access can be easy by using blow method. Gmail enable in your MAC laptop home screen is official features. So you must use Gmail Access from MAC menu bar in single steps. For that you don’t have to open Gmail in browser. We know that number of services and applications now available in app store and market link Outlook and other. But Gmail in menu bar for MAC is one of the best secure and fact as compare to other apps for MAC. Using this App you can do same thins which you already done in Gmail browser see in below screen shots.

This app Available in official app store for MAC itune from here in free.

MailTab for Gmail app download and run on 5 millions+ MAC laptop and desktop over worldwide as best Gmail access from MAC menu bar.

Visit it and comment in below how useful for you.

Useful:
How to logout Your all opened Gmail account remotly from one computer(Location).How to logout all opened Youtube account from single location.How to send File more than 25MB in Gmail

Features of Gmail for MAC

If you want to access fast Gmail account in your MAC system than you must use MailTab for Gmail. This MAC app works with OS X 10.7 and up. Your MailTab for Gmail looks like in below see,
Image
You can set in three different skins using the inbuilt skin functionality.
MailTab For Gmail Inbox-Gmail for Mac Laptop and PC 1

Inbox of MialTab for Gmail

Once you logged in your Gmail account your inbox looks like in below without Advertisement with clear design and format to access old to new mail easily.
MailTab For Gmail Inbox-Gmail for Mac Laptop and PC 2

Compose new mail from MailTab for Gmail in MAC

You can compose new mail to forward other by clicking red button at top right side of MailTab for Gmail app widget popup. See in blow
MailTab For Gmail Inbox-Gmail for Mac Laptop and PC 3

Setting in MailTab for Gmail in MAC

Easy to change setting from bottom spinner icon. By tapping it you can change your settings with shortcut key, notification and appearance easily.
Till now millions of MAC users are happy with this Gmail app : “MailTab for Gmail”. You must enjoy after installing in your Laptop and PC. So let’s install it and don’t miss your valuable suggestion in below comment box kindly.
MailTab For Gmail Inbox-Gmail for Mac Laptop and PC 4

Useful Search:

Best App for MAC, Gmail app for MAC laptop or PC, Best App in iTunes, Gmail short cut for MAIL, Best Outlook alternative for MAIL.

Don’t miss to share this article using below sharing button. Or you can get daily updates in your mail box by subscribing with Email.

Wednesday, February 26, 2014

How To See List Of Friends Whenever Unfriend You By Other Friend On Facebook

Friends, you are on Facebook than you must try to find out “Who is unfriend me of Facebook”, “List of friends who unfriend me”, “Unfriend by other” on Facebook. But official facebook never helps to know this solution. But you can know easily in step by step guide in given below.
How to know who unfriend me-unfriend-finder
Some of the time you fill some of friends are missing from my friends list. At that time you can mark who is that guise don’t want to become friend on Facebook. Or some of tine your friend unexpected unfriend to you.

Useful;
How to update google chrome for any error, disable unwanted ads, and Crash solution?

Step to find friend who unfriend you.

Step 1
Go to Google chrome plug-in extension “Unfriend Notify For Facebook”.

Step 2
Add Unfriend notify plug-in in your google chrome browser by clicking install button at top right of the screen. After wait minute it will automatically con fig with your google chrome browser.
Than you can check friends who unfriend you from your Facebook login under your friend list see in below screen.
Unfriend Notifiy in your facebook profile- Find friend who unfriend You.

Step 3
You can disable or enable and delete this plug-in from the below path. past below URL in new google chrome tab
chrome://extensions/
OR
Tools > Extension

I hope you will find the perfect solutions with step by step guide in how to know friends list in your Facebook account who unfriend you in his/her account.

Monday, February 24, 2014

Define Pagerank For To Increase SEO Performance. How To Check?

Each every blogger and webmasters always finding the term “Pagerank”, “What is Pagerank”, “How to increase is”, “Why I am not getting pagerank”, “Criteria to archive the best pagerank”.

If you don’t know then this post is helpful to you in future and you can archive good pagerank in short of time. At the starting stage of blogging pagerank should be zero. It will affect as on time to go with perfect blogging.

Pagerank gives you map of importance of your web in google search engine. Google give it after applying google pagerank algorithm. Google pagerank’s algorithm.
Define-Google-Pagerank-And-How-to-Get

Google algorithm finds the calculation your web post URL reputation on over the world wide websites including social sites. Means how many links are incoming on your web post.

Useful:
List of best Social Networking sites To promote your Website or blog.
Most Expensive keyword to increase more CPC in google Adsense. 
All Covered Points of SEO(Search Engine Optimization) 

What can affect the pagerank?


  • Content Quality
  • Incoming links
  • You want to archive good pagerank than above to parameter always to be in mind.

Explanation of Pagerank with Diagram – Incoming Links

You can see the above diagram with weighted percentage in ball. Pagerank directly depends on incoming link for your web page from the outside world’s web. That means you can archive more incoming links you will get higher PageRank.

If you are getting incoming links from higher PageRanked web to your pages. Then this is good for your web.

Explanation of Pagerank – content quality

Google algorithm is also structured on Quality of your article. Google search engine also check duplicate content for this post.

What are the basic things to get higher pagerank?

Finally you will get idea how to increase pagerank from the above example. Now we have to create incoming links for all post separately. You can create incoming link through the number of way from SEO strategy.


  • Submit in free directory listing
  • Submit your post URL to Google, Bing and Yahoo search engine.
  • Post commenting your link on high pagerank web

What will get after archive good pagerank?

You can archive Good SERP(Search Engine Result Page) rank. SERP rank can be archive using the Best and most popular keyword which is searches by people in google and other top most search engines.
Adsense also count your website or blog pagerank. You have to check your pagerank before submitting in google adsense. You can check your web pagerank over the internet online. To check click here

Final Word: Pagerank Giveaway

You can see the value of incoming links, Content quality for pagerank. Now our next article on How to be a good in Content quality and incoming links counts.

Other search: How to define pagerank in simple terms, what is pagerank, List of factors depends on pagerank, How to increase pagerank of blog and website sharply. What is relation of SERP and Pagerank in SEO(Search Engine Optimization).

I hope that you like effective and short explanation with example. Share this article on social sites from the below sharing button. If you have any question than put in below comment box.

Sunday, February 23, 2014

Set Auto Save Time Option In Microsoft Office Word, Excel, PowerPoint Document

Microsoft office save document in each 10 minutes as default time duration, But you can change it at own time limitation. Ex. If you want to save Microsoft document in each 2 minute automatically than you can set it for each 2 minutes.

This option is available in all Microsoft products including Excel, Outlook, PowerPoint, Publisher, Visio, and Word.

This option is available can be help to protect our use full data, we don’t need to recover data after click on unexpected close button, Or stop power supply, System crash and number tough situations.

This option is available in all past released old version and also available in upgraded version, Microsoft office 2012, and Microsoft office 2013.

Steps to set Auto save Microsoft office document option in below:


Step 1: Click on office button (Top Right) from your opened document. If you don’t find than see below image
Microsft-Office-set-Auto-save-document

Step 2: Click on option, for word document it will be rename with Word option, Excel option…act,
See below image
Microsoft-Office-set-Auto-save-document-2

Step 3: Hit the click on option that you will see second window on your document, than the save minute option under the save tab.
Microsoft-Office-set-Auto-save-document-Step-3
GO Save Option > Save > Check box for save auto save information for in minute. You can set minimum 1 minute. Set it as min as possible.

Step 3: Click Ok. Finish

For Manual save Document

If you want to save your document manually, on before and after auto save time period you can do with Ctrl + S from your keyboard.

Useful:
Steps to recover office document from unexpected close or stop.

This helping article also helps to other guise. So don’t forgot share this article from the below sharing button.

You can also read our daily helping tutorial on interested subject in your mail box. Subscribe through the blow Email subscription and don’t ignore to activate from your mail box.

How Backup Or Restore To Unsaved Data From Microsoft Office Word, Excel, Powerpoint 2010

Microsoft office gives inbuilt function for auto saved document option available but sometimes unexpected close Microsoft office document like Microsoft office word, Excel, Visio, PowerPoint act,

You can also set auto save time (1 to 120 min) in Microsoft office document manually.

What time we need this data recover option?

Suppose you are closing other window from the screen and unexpected you close the Microsoft document like word. Else before that you will see the message do you want to save unsaved data and you have clicked no by you.
In the second scenario suppose your system might be crash or power supply problem.

Solutions are given to Backup or Restore to unsaved data from Microsoft office in two different methods one by one in below.

First method to recover Microsoft office document


  • Closed document when you opening it will ask to recover this file. If you don’t find this option than click on Top right office button in below image
    Microsoft-Office-set-Auto-save-document
    Microsoft-Office-set-Auto-save-document

  • Recover unsaved Document automatically visible under this option automatically.
  • Microsoft-Office-set-Auto-save-document-2
    Microsoft-Office-set-Auto-save-document-2
  • Click on this option than unsaved data file open in another Microsoft office window with “save as” option under the top ribbon see in blow image.
  • Recover-Micosoft-Office-document-4
    Recover-Micosoft-Office-document-4
  • Click on save as option and get recovered document in your hard drive.


Second method to recover Microsoft office document

Second method should be of use if first method is not helpful
1. For windows 7, Windows 8, and vista user can see the recover data in below path.
C >Users > Your own User name (Folder) > AppData > Local > Microsoft > Office > Unsaved Data

2. And for Windows XP users can see the recover data under below path

C > Document and Settings > you own user name (Folder) > Local settings > Application > Data > Microsoft Office > Unsaved Files

You can also recover doing this in below image also

Recover-Microsoft-Office-document
Recover-Microsoft-Office-document-0
This must be helps to you. We have been received very positive feedback through the mail. If you have any problem regarding or your suggestion then put your speech in below comment box at last. You can also share through the below social icon.

Friday, February 21, 2014

Google Adsense Wire Transfer Or (EFT) Online Transfer Will Be Available In India: Soon Now

Dear Adsense publishers now EFT(Electronic Fund Transfer) or online payment transfer available for Indian adsense publishers in short time may be in new two to three week. Google adsense officially declare that now Google adsense providing EFT service for Indian publishers in February ending. Before that google adsense pay money only one option “Check”. Now google adsense for Indian has two options. You can receive your adsense income with Pay by check or EFT transfer (Directly your Bank account).

Google adsense also declare some basic rules for this option only for security purpose. If you are fired from google adsense so use other google adsense alternative.

Who is able to receive your adsense payment in his/her Bank account?


  1. You are locating or staying in India. Means your submitted payment address in google adsense must be Indian address.
  2. Minimum balance in your adsense account must be at least $100. It will be seen in your payment page.
  3. No any adsense payment is holding mode.
  4. A bank branch or bank must be Indian. Means your bank branch have unique IFSC(India n Financial System) code.
  5. Currency charges might be automatically applied by the bank.

  • How to find IFSC code: Find here
  • How to find my IFSC code offline and Online?


Don’t miss:
  • I didn’t receive google adsense verification pin. What I do? Solution available here

What details I have to submit in google adsense?


  1. Bank account number.
  2. Bank account name same as google adsense account’s payee name.
  3. SWIFT code(inquiry in your bank)
  4. IFSC code(it should be printed on your check book or pass book also)


How much time will take to transfer using EFT or online transaction?

It will take two to three day after applied new request to transfer directly in your bank.

Set up to get adsense income or payment through the EFT or online banking

Go with Google adsense account and move payment setting option under the Payments. Now you can see payment option with Pay by check and EFT beta. Select “Wire transfer” to submit all the details relevant to your bank account details which are declared in above point. So be care full don’t share this with others or fill up accurate with double verified.
See in below screen:
Google adsesne Wire transfer submission form and Details
Related Search For this post:

  • How to transfer google adsense money quick in my bank account?
  • How to withdraw google adsense payment in bank account?
  • How apply EFT option in google adsense account?
  • What are rules on EFT payments on Indian adsense publishers?


For more new updates and tips and tricks connect with US by subscribing our dials news updates in your mail box.

Wednesday, February 19, 2014

Download XAP file or Windows mobile Apps in your PC from Microsoft’s windows phone market store

Any mobile app can’t directly download in your PC or Laptop. Same as for windows mobile you never can download means mobile connection. In windows mobile App format XAP download in your PC or Laptop. For that you have to follow the below easy step to Download XAP file or Windows App file in your PC.

How to Download Windows mobile APP or XAP in PC or Laptop: Step by Step

Step 1
Go: Official windows market site for here: http://www.windowsphone.com/en-us/markets

Step 2
Search App or Game in your Search Box at top right corner. More see in below snap for downloading windows XAP file for “Permia Duels” game.
Note: Before install or Download Any XAP windows file you have to register yourself by click on signup.
Downlaod XAP File in your PC from Windows App store Step 2

Step 3
Click and Enlarge your App like see in below. Then move down by scrolling your windows screen. Finally you will find “Download and Install Manually” option at right bottom side of the screen.
Simple hit click and download in your Device hard drive might be PC or Laptop.
Downlaod XAP File in your PC from Windows App store Step 2

Step 4
Connect you windows Phone with PC and Enjoy with copy pasting and installing in mobile.

Useful: 
How to download Android APK file in PC?
How to install External android APK in your mobile from PC?
Related Search:
How to install Windows XAP file in Mobile manually?
Download XAP file in PC or Laptop.
Downlaod XAP App file without mobile.

I hope you will find the details steps to download windows XAP file in your PC or Laptop manually. Don’t miss to share with your friends by social button. Comment in below comment box if any problem or feedback.


Thanks for visiting,

Microsoft’s Onedrive Now Live With 100GB Free Space: Best Cloud Storage

Microsoft’s service on cloud storage “OneDrive” now live. Millions of Microsoft’s fan waiting since last 6 month that is OneDrive. Before 6 month Microsoft officially declare Skype Drive has been stops and it will be publish with new one name that is OneDrive including List of many features. Motto behind new one cloud storage OneDrive is getting users data secure any time.

OneDrive released for desktop computer and Mobile phone also. Make Windows computer secure with OneDrive installation setup.
OneDrive for PC, Laptop or Mobile (Android and Windows) Features

Why SkypeDrive Renamed with OneDrive?

Microsoft gave answer of this question in official form. Microsoft said that naming confusion put Microsoft’s cloud storage service compare to any other services in market. OneDrive means you can collect all data in single drive between all the devices which you are using on different platforms like Android, IPhone and Windows.

Microsoft’s OneDrive for android now available in Google play store

OneDrive is for mobile now available on Android and Windows platform also. You can download and install OneDrive from google play store from OneDrive in PlayStore link here

Useful: How to download android OneDrive APK file in computer from Google play store.

Microsoft’s OneDrive for Windows Mobile Phone

Direct Link to download and install OneDrive in Your windows Smart phone from Onedrive in Windows Market here

Useful: Download Windows XAP file in your PC or Laptop from Windows App Market without mobile.

Features of OneDrive


  • Auto updates your OneDrive from your Smart phone with Camera photo and video beckup.
  • Working and ménage everywhere on all devices
  • Larger UI design and Easy to customization
  • Batter performance as compare to other cloud storage services
  • Direct sharable your think on all social sites


OneDrive Storage Capacity:


Free 7GB at login time, 3 GB only for camera backup (Photos + Video), 500 MB on each referral by you. 100 GB office 365 users, you can buy for $0.50 per GB per Month.

Related For this post:
How to increase Storage Space in OneDrive.
Best Cloud Storage in 2014
Best Features of OneDrive
How to Use OneDrive in PC or Mobile.
How to share big file OneDrive?


i hope you like this post, so Don't miss to share this article with your friends.

Thanks for visiting,

Latest Nero 12 Full Version Free Download With Crack Patch And Serial Key For Windows 7, 8, XP And 8.1

Friends, Latest Nero 12 full version with crack and patch for CD or DVD burning give giveaway experience than any other software available in market online. Nero 12 support all file formats and you can make CD/DVD, Audio and Video auto play disk. You can check out latest features in Nero 12.

Best Futures in Latest Nero 12


  • Nero Burning Rome
  • Nero Backup
  • Nero Video
  • Nero Record
  • Nero Kwik Media
  • Nero Blue-ray Player
  • Nero Control Center
  • Nero Rescue Agent
  • Nero Express

Nero 12 Latest with Crack-Patch and Serial Key

Nero 12 Supporting OS:

Latest Updated Nero 12 supporting Windows XP, 7, vista, And Windows 8.1.
Nero 12 also supporting server OS: Windows Server 2003, 2005 and 2008 also.
Above all features are available for full version that’s available in below download link.

Nero Download from Torrent: Click to download Nero 12 with Crack/Patch and Serial key torrent file.
If you don’t have any idea “How to download using torrent downloader please read our step by step guide

Dropbox link temporary close due to over bandwidth...But you can download from torrent link give in below. This link will be open in short time..
Direct Download link from Dropbox: Click here to download Nero 12 full version free .


Useful:

  • For quick download torrent using IDM (Internet Download Manager) read and download Nero using this steps given here

How to installation guide for Nero 12 in windows 7, XP, Windows 8 and 8.1

1. Downloaded File available in ZIP file. First unzip by right clicking and select “Extract here”.
2. In between installation Nero please use Key provide with Nero 12 zip file package.
3. Wait and Reboot your system for full configuration automatically.
4. After installing Nero, Run patch setup at a time before and other update.

Now you can enjoy Nero 12 full version, you must enjoy this article and correct guide so please share this helping post with your friends. And kindly comment in below.

If you have any other problem in Downloading and installation. Please notify me through the below comment box.
Thanks for visiting,

Stop Auto Updates In Windows 8.1 And Windows 8: Disable OS And APPS Updates

Friends, Automatic update is most useful ways in windows 8 to 8.1 update. Automatic update on windows 8 make your Windows OS to Windows 8.1(Upgraded version) by Microsoft official. But if you are using trial or crack version of Microsoft Windows 8 or 8.1 than automatic update put you in trouble with making your OR genuine. At the end some of functionality and Security problem arise in windows 8 or 8.1. This is the reason to stop or Disable windows 8 or 8.1 manually.

Useful : Never miss


Steps to stop or Disable windows 8 or 8.1 updates: How to


Windows 8 or 8.1 automatic updates stop process same as compare to windows 7 or vista. But you can’t do or use previously this windows OS. So kindly follow the below steps which is given with picture snap.

Step 1
Go setting button from your windows 8.1 or 8 screen, you can see from the right pane of your side in your screen by hovering mouse on that region. From the visible pane strip choose Settings icon and open it.
stop or Disable Windows 8 or 8.1 auto update step 1

Step 2
Now you can see small menu bar with options are Control panel. More see in screen.
stop or Disable Windows 8 or 8.1 auto update step 2

Step 3
Now you can see one of two screens as of your settings. If you icon is big than you can see as of first image of below two. Else you can see second one in your screen.

Click on System and Security for first screen
Click on windows Update for second screen.
stop or Disable Windows 8 or 8.1 auto update step 3

Step 4
Now your screen must be in below. You can choose one of them by selecting as of your requirement.

From my site you have to select “never check for updates” under the important updates. Because this option never updates your windows 8.1 without your change from here.
stop or Disable Windows 8 or 8.1 auto update step 4

Don’t miss: You never miss best App for windows 8.1 free.


Hopefully you must do your job “How to stop or Disable windows 8 or 8.1”. If you have any problem related to your windows OS kindly comment in below comment box. We will help 100%. Or you can also share useful guide with your friends by sharing on social sites through the social sharing button in below.


Monday, February 17, 2014

Best way to build organic backlinks traffic for blog or website in SEO tips

Friends, you want best SEO score than you have to improve backlinks number for your blog or website.
Becklink create is more easy in today time as compare to 10 years ago. You can build backlinks for your blog or website using creative implementation on your article writing and article connectivity. Google algorithm Penguin and Panda updates affect on many blog or website which has lower backlinks as compare to other same category blog. Now each webmaster must concentrate on organic backlinks building techniques.
Create or Build Organic Becklinks for your blog or Website
Create or Build Organic Backlinks for your blog or Website

What is organic backlinks building?

Organic backlinks set up connectivity between visitors and your blog or Website. Organic backlinks are including top most search engine links where users/Visitors are intersect to your blog or website naturally.

Best Ways to Build/Create organic traffic for your blog or website

Controversies
For that you have to publish daily article on the basis of your website categories. Use valuable and most popular keywords in each blog post. As a result you can make your article more stable over same category post on other blog or website.

Useful: Wordpress ping list Updates 2014 to get higher index in top search engine.

Experience
Experience in your internet life makes backlinks building experience easy to reach target visitors over worldwide by publishing interested articles on same topics and categories.

Freebies
Freebies is more important to get natural traffic regular. You can convince to visitors by subscribing news article by email. Or mail marketing service on target users.

Group Engaging
Today thousands of group communities are available to meet target visitors by submitting article over Group engaging websites which has good pagerank. Thousand of successful blogger and websites master meet these types of connectivity.

Video Tutorial
Create awesome video tutorial with linkable video and share it on other websites get natural backlinks for your blog or website.

Don’t miss to awesome other SEO(Search Engine Optimization) tips, Best backlinks and Pagerank techniques making your blog SEO optimized.

Guest post is also attractive way to create more backlinks regularly. For that you have to advertise on guest posting for your blog who are waiting for your permission and declaration. In conclusion you will get SEO rated blog or website.

Useful: Meta tag selection and correct use of Meta tag.
Useful: URL submission to top most search engines.

If you have other stuff and tricks to get more backlinks using organic traffic in your blog or website.

Shortcut keys of computer to save time: Short Cut key for Browser, Windows 7/8 and XP

Friends, If you are using short cut key of computer in daily routine to access your Desktop computer or Laptop than you can save 40% of time to internet browsing search and documentation preparation ect.
I hope you will apply as soon as possible in your Office, School, and Collage or even at home computer or Laptop. You can mark this point short cut key to access and machine as same for all devices but mouse option changeable like laptop will work on touchpad and Tablate also.
Shortcut for Browsing and Window using Keyboard Key

I hope you will find the all useful shortcut to access your Computer or Laptop. So book mark (Ctlr + D) this page and Use all short cut key in daily basis. It will help to in future for as professional developer or Person.

Shortcut keys of keyboard for Browsing

Ctrl + Shift + T: To reopen recently closed tab. Not last one but all closed by your side accidently or unexpected closed.
Ctrl + Shift + N: For secure browsing. If you are accessing unknown place than you must do surfing with secure browsing property. This functionality doesn’t store history and Password.
Ctrl + Shift + Delete: To clear browser history.
Ctrl + W: To close recent browser tab.
Ctrl + “-”: Zoom Out
Ctrl + “+”: Zoom In
Ctrl + Tab: To move between opened tab serially.
Ctrl + H: To see history
Ctrl + D: Current Page Bookmark
Ctrl + N: To open new windows or New Tab
Ctrl + K: Move search bar in browser.
Space: Scroll down in web page
Shift + Space: Scroll Up in web page

Alt + Home: To move browser home screen.
Alt + D/ F6: To go on browser address bar.
Ctrl + Enter/ Ctrl + Click: To open link in new tab
Ctrl + R/ F5: To refresh or reload current browser or tab or Webpage.
Ctrl + T: To open new tab in same browser. It works for all browsers.

Useful: How to open multiple links in different tab on your browser at a time in single click

Shortcut keys of keyboard for windows

Win + E: Open my computer at any time without minimizing your working windows or close.
Win + M: Minimize open windows on screen one by one by pressing keyboard key (Win + M).
Win + D: To move to desktop screen or Startup screen.
F2: To rename any file, Folder or Setup file also. Just select it and Press F2.
Win + L: To lock Windows. It doesn’t shutting down your PC only lock your screen temporary.
Alt + Tab: To switch between opened multiple windows at a time.
Ctrl + Shift + Esc: To open start manager from there you can stop any executed program directly from there.
Alt + F4: To close selected program or window.
Shift + Delete: Remove any of data from your Computer permanently.(it doesn’t move in recycle bin)

Don’t miss to read our articles on Computer, How to guide, and Internet Tips.

Related Search For this post:
Shortcut keys for windows 8, shortcut keys for windows XP, shortcut keys for windows 7, How access computer easily, How to run PC without mouse.

I hope you find the all useful shortcut keyboard key to use in daily routine. So book mark this page and follow daily. Don’t miss to share with your friends by clicking on below sharing button.

So, Thank for visiting. You can also subscribe our mailing list to get latest update in your mail inbox.

Sunday, February 16, 2014

Bluestacks Solved Error: 25000 Graphics Card Updated, 2GB Memory, Video Card Error In Windows 7/8, XP And MAC OS

Friends if you are face problem of Error 2500 Graphics card Update notification error at the time of bluestacks installation time to run, Install and play android apps and game in your PC or Laptop with windows 7/ 8/ XP or MAC OS. I got confident solution at the time of installing bluestacks in my home PC.

So you have to follow the simple easy steps just give in below with screen snap and description text.

You are making Your PC to play any android Game and other social App, Business, Online Shoppting Apps in your PC and Laptop with Windows 7/8, XP and MAC os. Than some time you might face problem that’s in below.

1. Bluestacks 25000 Error
2. Bluestacks 2GB Memory Error
3. Bluestacks Video Card Error

Here I gave resolve solution of above errors on bluestacks in below.

Step to solve Bluestacks 25000 Error

Reason behind this error is that whenever you are installing newer/updated version of bluestacks in your machine bluestacks find the updated Graphics driver to run any android apps easily. For that you have to install older version of bluestacks in your system.
bluestacks Error 25000 graphics, 2GB, physical Error
bluestacks Error 25000 graphics
image source from @thetechmania 

Step 1
Your error screen looks like in below,
So, Download Bluestacks (Older version) from here: Click here Bluestacks download

Step 2
Don’t miss: How to start download in IDM?
                : How to download APK file from Google Play Store in your PC and Laptop? Directly.
After Download APK file from Google Play store. You can install any APK file by right click on APK file and Select run and Bluestacks.

Steps to solve Bluestacks 2GB Memory Error

Thousand of my friends doesn’t happy with this types of error but you can also play after giving this error. For that you have to install lower version of Bluestacks in your PC or Laptop.

Step 1
So, Download Bluestacks (Older version) from here: Click here Bluestacks download

Step 2
Don’t miss: How to start download in IDM?
                : How to download APK file from Google Play Store in your PC and Laptop? Directly.

After Download APK file from Google Play store. You can install any APK file by right click on APK file and Select run and Bluestacks.

Related Search For this post:

  • error 25000 while installing bluestackss in windows 7
  • error 25000 bluestackss
  • Error 25000 of Bluestackss on Windows 8.1
  • error bluestackss 2gb physical memory
  • error bluestackss windows xp

I hope you will find the perfect solution on above suffering problem. Don’t miss to share and subscribe our useful article in your mail box. Don’t miss to comment for our help at any time.

Teen Patti Download And Play In Your Windows 7/8/XP PC And Laptop: Teen Patti Play On MAC

Teen Patti is one of the most popular game for online and offline mode. My friends always search way to Download, Install and Play Teen Patti. In Teen Patti game users can enjoy virtual money in dollar by performing in a Teen Patti game. Basically teen Patti come for only in android in this game user can invite any friend by social sites Facebook. And finally you will get more money and points to play teen Patti for time to go. If you don’t have android smart phone but you can enjoy same level game experience in your PC and Laptop.
Teen Patti game free for PC and Laptop

See the List Main features before Download Teen Patti in your PC or Laptop for Windows 7/ 8 and XP

• Through this game you can set and play any unknown competitors around the world
• Game gives amazing experience to earn money with real friends
• Manage your group and win teen Patti game at any time.
• Free Chatting and Talk to other in free

Teen Patti for PC and Laptop download: Windows 7, XP,8 and MAC

Step 1
First you have to download and install android environment Bluestack in your PC or Laptop from here

Step 2
Install Bluestack (Run Setup), it will take 2 to 3 minute.

Step 3
From bluestack search box find “Teen Patti game” and install there by clicking on it.
Done, now you can enjoy it from installed app button from bluestack home screen.

Useful: Play all (any) android game in Windows/MAC OS.
           Install APK file in your PC and Laptop.
           Download And Install Subway surfer game in PC
           What Up lock for Android free

Related search For Teen Patti Game Download,
Downlaod Teen Patti for PC, How to play Teen Pattin on Windows or MAC PC/Laptop? How to install android Teen Patti game?


Wednesday, February 12, 2014

Wordpress Ping List 2014 To Archive Index Of Your Website Ranking – Ping List For SEO

This summary is not available. Please click here to view the post.

Play all android game in MAC OS Free: Step by Step guide to install android game/App on MAC machine

Friends, Android fan always find trick to play android game in MAC with Macbook or MAC laptop in free. So new I try to give solution on “Play all android application/games on MAC or MACbook with installing android APK file”. Using this computer tips you must enjoy android app in your MAC machine.

Useful: Play subway surfer android game on Windows PC for windows 7/8 and XP.

Step to install/Run/Play any android App and Game on your MAC machine

Step 1
First download and install android platform in your MAC device, powered by Bluestack. So you have to download Bluestack software from its official site here.

Bluestack for MAC direct link – file size (116 MB)
Install-Play-Run-Android-App-Games-In-MAC-OS-System

Step 2
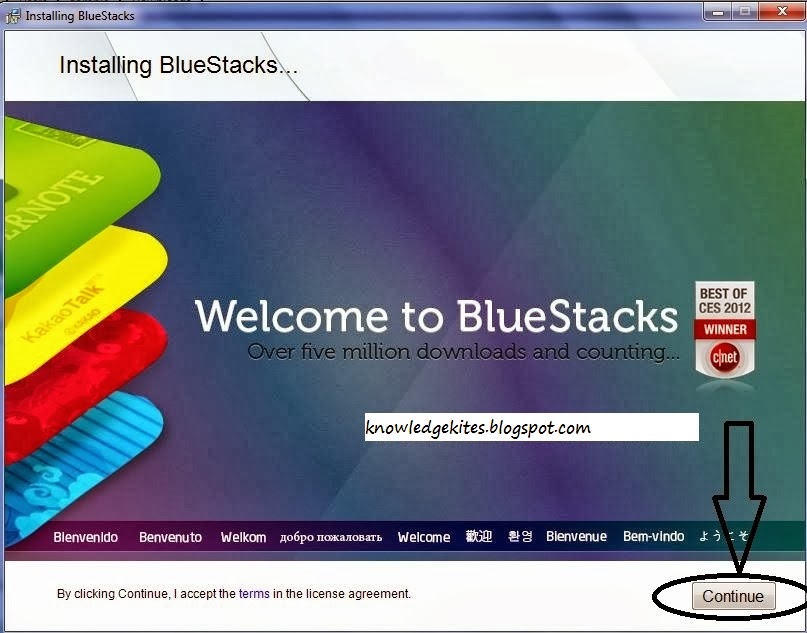
After step 1(Download Complete) Run setup file. You can see below screen in setup installation.
Install-Play-Run-Android-App-Games-In-MAC-OS-System

Install-Play-Run-Android-App-Games-In-MAC-OS-System

Step 3
Deselect all the check box in installation for below screen.
Install-Play-Run-Android-App-Games-In-MAC-OS-System
Step 4
Now you have complete final installation to complete the installation, take a tea and wait for complete.
Install-Play-Run-Android-App-Games-In-MAC-OS-System 3

Step 5
After complete the installation your bluestack home screen looks like in below.
Install-Play-Run-Android-App-Games-In-MAC-OS-System 4

Now be ready to play and enjoy awesome android app and games in your MAC machine, macbook.
From the bluestack home search you can search any of the android app – Games direct install in your MAC machine.

Installed app you can see from the home screen under the “My App” see below screen. To play again you don’t have to re-install for that just open “My App” and select what you want to play.

Search for this “How to install android game and app in MAC system or Mac machine or Mac book

Download android game in MAC, Install android big app in MAC.

If any of link is not properly redirect or you may be unable to download that please point in below comment. We must resolve your problem.